eatingRD.com Food. Fitness. Nutrition. Life!

March 10, 2009

technical difficulties

Filed under: Blog — Kristen :) @ 4:15 pm

Hey all! I just wanted to let everyone know that I had to send my computer in for a new motherboard (need to get a second surge protector) and won’t be able to post very well for at least a week or so since I have limited access to a functioning computer. I’m hoping they will send it back soon! I love computers and technology, but when they don’t work it’s a real bummer! And it’s right during midterm cram time . . . perfect! I will do my best, and thanks for bearing with me!

-Kristen 🙂

What was your worst computer nightmare??

March 6, 2009

where have you been all my life?

Filed under: Blog,Dinner — Tags: — Kristen :) @ 4:06 am

100_2433

It seems like forever since I’ve had salmon, but it’s probably been a good 3 weeks I would say.  I absolutely love fish, but it is so darn expensive and can go bad so quickly that it’s hard for me to buy.  I usually buy the canned salmon and try to incorporate more fish that way.

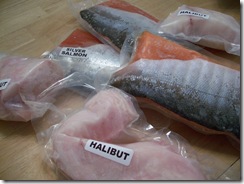
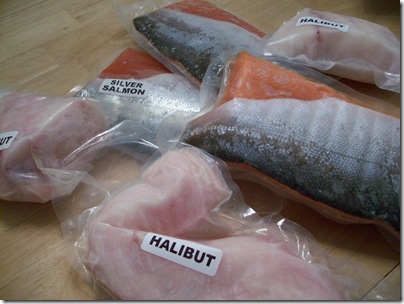
It is recommended to have at least 2-3 servings of fish per week for optimum heart health, but I know I fall short most weeks.  That’s why I was so excited to get a bunch of flash-frozen fish from a family friend the other day.  Yippee!

100_2432

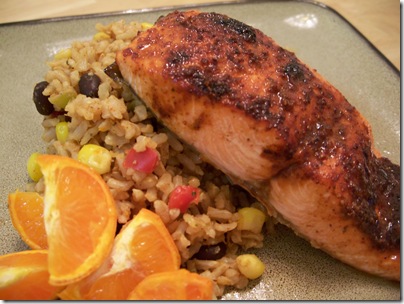
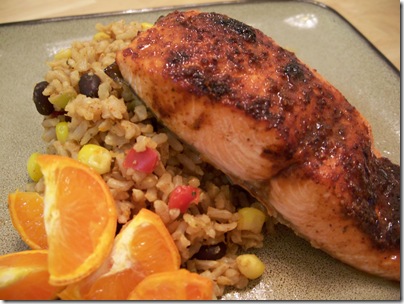
So for my first fish recipe in the string of many soon to come, I tried Sweet Orange Salmon from CookingLight.  The simple rub is a coating of different spices that gives it a nice sweet and spicy crust.  I was running low on side ingredients, so I settled on a brown rice pilaf with a frozen veggie mix of black beans, corn, broccoli and bell peppers along with all the spices mixed in from the rub.  Boy do I love salmon!

Sweet and Spicy Salmon

Ingredients

  • 2 tbsp brown sugar
  • 1 tsp chili powder
  • 1/2 tsp graded orange rind plus about 1 tbsp juice (I only had clementines on hand)
  • 1/2 tsp ground cumin
  • 1/2 tsp paprika
  • 1/4 tsp salt
  • 1/8 tsp black pepper
  • 4 (6 ounce) salmon fillets

Mix all ingredients in a bowl (I doubled the recipe since I had more salmon) then coat the salmon fillets.  Place on a foil lined baking sheet and bake at 450 for about 10-12 minutes, depending on the thickness of your fillets and your desired degree of doneness.  Serve with your favorite side!

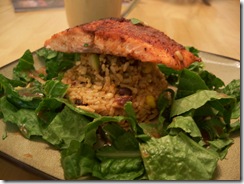
100_2436Chris took a picture of his plate presentation, which is a modern approach!

He also made a vinaigrette out of the crock-pot apple butter I made with rice vinegar, a dash of olive oil and apple cider, salt and pepper.  Yum!

Now I have to think of leftover salmon ideas because we have so much leftover!   Any ideas?  A nice Asian salmon slaw comes to mind . . .

100_2433

March 5, 2009

snacky wacky

Filed under: Blog,Breakfast — Tags: — Kristen :) @ 6:13 am

100_2425 At any given time during the day, someone could ask what I have in my bag or purse and I will always have some kind of snack!  Whenever I go out for errands or anything outside the house I always have to bring something along just in case I get stranded for hours with nothing to eat . . .heaven for bid!  It is really important to eat something every 3-4 hours and not go too long without.  This really keeps the metabolism going, our sanity in check and our brains from getting drained and fatigued.  I always get ‘cranky’ if I don’t eat consistently!  It doesn’t have to be something big (and really shouldn’t be), but just something to feel energized and not too ravenous by meal time.

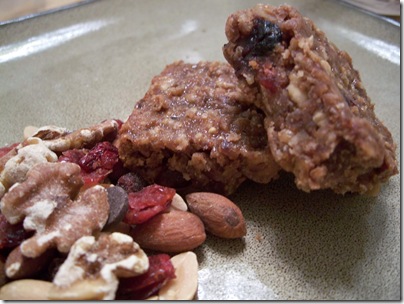
I first found out about these bars from The Chic Life, who adapted them from Ellie Krieger, and thought I would try my hand at them.  I always like to get some kind of bar at the grocery store, but they are just so darn expensive!  With these bars, the initial cost is higher to buy all the ingredients, but over time I can make batches and batches of these for the fraction of the price of bars bought in the store.  And they really taste great and wholesome without funky ingredients added.  I do have a few notes added that I want to try next time to reduce the calories/fat a little bit more.

Instead of using store-bought apple sauce, I tried to make my own apple butter! (or apple goo as Chris likes to call it)  It turned out really good and I used it in this recipe.  I also like to mix a scoop in my morning oatmeal or have it as a spread on a turkey and cheese panini.  It lends a wonderfully rich apple flavor.  Place about 2 lbs of peeled and cored apples (I used a bag of empire from TJ’s), a hefty sprinkling of cinnamon and raisins all in a crock-pot.  Pour about 2-3 cups of apple cider on top and cook on low for 6-8 hours.  Let cool and refrigerate!

Homemade Granola Bars

Ingredients

  • 1 cup 1-minute quick-cooking oats
  • 1/2 cup whole-wheat flour (pastry if you have it, but I didn’t)
  • 1/4 cup toasted wheat germ
  • 1/4 cup non-fat dried milk powder
  • 1 tsp cinnamon (of course I like to add more!)
  • 1/4 teaspoon salt
  • 1/2 cup honey
  • 1/2 cup unsweetened applesauce (or crock-pot apple butter – see above note)
  • 1/4 cup canola oil
  • 1 egg, beaten to mix
  • 1 egg white
  • 3/4 cup chopped dried cranberries
  • 1 cup finely chopped walnuts and pistachios or your favorite mix
  • 3 tbsp ground flax seed
  • Cooking spray

Directions

Preheat oven to 350 degrees F. In a medium bowl, whisk together the oats, flour, wheat germ, milk powder, cinnamon and salt.

In a medium-large bowl, whisk together the honey, applesauce, oil, egg and egg white until well combined. Stir in the oatmeal mixture until well combined. Add the dried cranberries, flax seed, and nuts.

Coat an 8-inch square baking pan with cooking spray (mine was a little bigger). Spread the mixture (as flat as possible) into the prepared pan and bake until a toothpick inserted in the center comes out clean, 30 minutes. Cool completely and cut into 12 bars.  The flavors intensify even more after a day or so.  These are wonderful mixed in some non-fat greek yogurt or use them for dipping!

image

Nutrition Facts compliments of nutritiondata.com.  This is a great website to look at the nutritional profile of thousands of foods and analyze recipes.

A Few Notes for Next Time:

-If I use 2 egg whites instead of the whole egg and reduce the canola oil down to 2 tbsp, the total kcals would be reduced to 220 with 10g of fat.  These are pretty moist already, so I’m going to give it a try!
100_2430

I went to visit a good family friend the other day and look what they gave me!!!  Every July their family goes to Alaska and catches tons of wild fish from salmon, halibut, cod and red snapper.  I am sooo excited to get cooking with it!  I don’t eat as much fish as I would like because it can be so darn expensive, so I am really looking forward to making lots of fish in the near future . . . stay tuned!
100_2432

Any ideas on your favorite fish recipe?
March 3, 2009

Sometimes you feel like a nut & BPA-free bottle giveaway!

Filed under: Blog,Dinner — Tags: , , — Kristen :) @ 5:56 pm

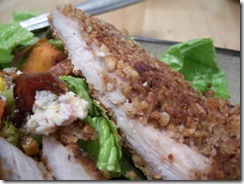
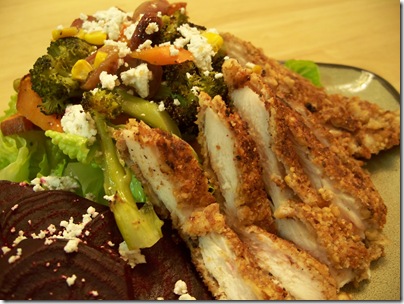
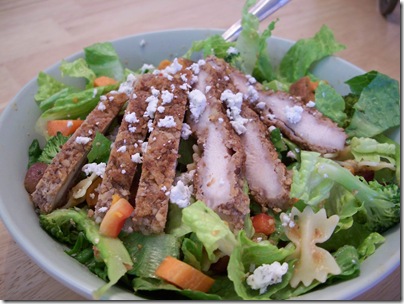
100_2388 Walnuts that is!  I first found this recipe in FOOD magazine and it’s a great alternative to your traditional chicken fingers.  Plus you get a healthy dose of omega-3s.  The walnut coating really keeps the chicken moist and it has a wonderful roasty toasty flavor.

I also tried to brine the chicken breasts before coating them to increase their moisture and juiciness.  I wouldn’t brine them longer than 45 minutes to an hour or else they can get too salty and dry out.  Since my taste buds have grown accustomed to less salt, I can really notice salty flavors.  But, brining for about an hour made the chicken really moist and flavorful.

Here’s what I did for the brine:

  • 4 cups H20
  • 1/3 cup salt
  • 1/3 cup sugar
  • 2 smashed garlic cloves
  • pinch of black pepper and an all-purpose seasoning
  • 1-1.25 lbs chicken breasts cut lengthwise to make flatter

Place all ingredients into a zip-lock bag and mix well until dissolved.  Place prepped chicken breasts in bag and let marinate for 45 minutes to an hour.  Pat dry before coating.

Now for the lovely coating (these measurements are approximate depending on how much chicken I have):

  • 2 cups roasted walnut pieces
  • 1/4 loaf TJ’s garlic ciabatta bread pulsed into breadcrumbs in the   food processor (or about 1/2 cup of your favorite breadcrumbs)
  • 1/3 cup parmesan/romano cheese blend
  • garlic powder and all-purpose seasoning like Mrs. Dash
  • 1 egg or 2 egg whites
  • 1 cup of flour
  • 1-1.25 lbs brined chicken breasts

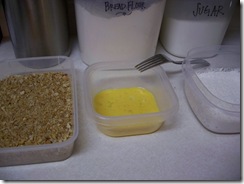
Place the walnuts, breadcrumbs, parmesan and seasonings in a food processor and pulse until a course crumb coating forms.  Place this mixture into a shallow wide dish.

Place beaten egg or egg whites in another shallow wide dish, and the flour in another shallow wide dish.

100_2380Let’s get coating!  Place brined chicken breasts on a plate lined with paper towels to pat dry.  For each breast coat in flour; shake off access.  Then coat in egg; shake of access.  And finally dredge in walnut coating.  Place chicken in a large sauté pan over medium-high heat with a little olive oil for about 5-7 minutes each side (depending on the thickness) until golden and slightly firm to the touch.  You may have to do several batches, wiping out the pan.  Let rest on paper towels to absorb excess oil and enjoy!

100_2381

Enjoy with a nice side salad and roasted veggies.  These also make for great leftovers like baked chicken pasta parmesan.

100_2390

The Health Nut is giving away BPA-free Nalgene bottles to a lucky winner and the contest ends soon, so get over there and make some comments!  I haven’t quite made the complete switch to BPA-free bottles, but I would like to just out of precaution with the studies out there and the possible dangers with BPA.  I love those bottles because they really keep me drinking enough while at work and on the go.

March 2, 2009

Trim the fat not the flavor . . . tamales!

Filed under: Blog,Dinner — Tags: — Kristen :) @ 1:44 am

100_2401

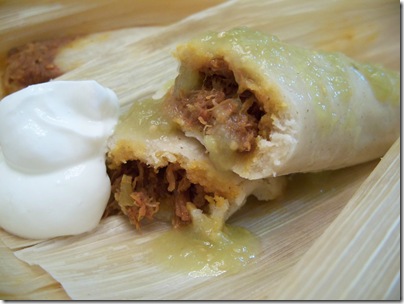
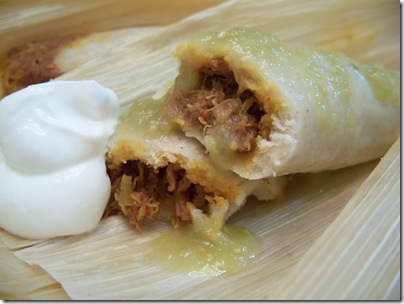
When we first made the Chili Chicken Taco recipe in the crock-pot, we had the idea of trying it as a tamale filling!  We’ve never made tamales before, so this was an adventure to say the least.  It was actually pretty easy and didn’t take too long since the filling was already cooked in the crock-pot and ready to go by the time we got home.

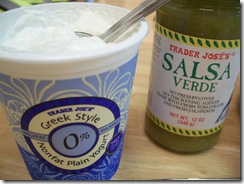
I searched for recipes for the basic tamale dough and settled with one from CookingLight.  Many of the ones I searched for on other sites called for a whopping one cup of vegetable shortening!  I just couldn’t do it, and I don’t think I’ll be ordering 100_2394tamales from a traditional Mexican restaurant for awhile!  Although these tamales weren’t your traditional flaky, trans-fat laden goodness, they still were pretty good and could be incorporated into a healthy meal plan.  I served non-fat Greek style yogurt and salsa verde on the side for dipping.

100_2399I’m not much of a beer drinker, but I do love the Pyramid Apricot Ale, and this beer goes really well with spiced Mexican and Mediterranean food.

These tamales are great for leftovers and freeze really well.   Chris even had one for breakfast as huevos rancheros topped with an egg, refried beans and a sprinkling of cheese.

Chili Chicken Tamales

For the masa dough:

  • 3 cups masa harina
  • 1 tsp salt
  • 1 tbsp butter (I will try it with vegetable shortening next time?)
  • 2 tbsp canola oil
  • 1- 1 1/4 cup fat-free, less-sodium beef broth
  • 1 cup water
  • 16 corn husks (soaked in warm water for 30 minutes)
  • salsa verde and non-fat greek yogurt for dipping

To prepare the dough, combine masa and 1 tsp salt in a large bowl.  Add butter and oil; stir well.  Add broth and water; stir until soft dough forms.

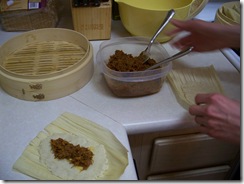
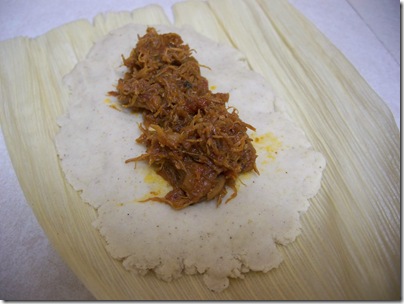
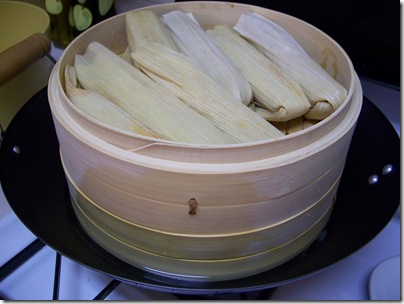
100_2391Working with one husk, place about 1/4 cup masa dough (depending on the size of the husk) in the center of the husk; press into a 4 x 3 inch rectangle.  Spoon about 3 tbsp chicken mixture down on one side of the dough.  Using the corn husk, roll up, jelly-roll style; fold bottom ends of husk under.  Repeat procedure with the rest of the husks and place in a steamer (we used a bamboo one), and steam for 45-50 minutes, or until the dough is firm.  Remove from steamer and let stand for 5 minutes.  Serve with your favorite condiments!

Here are some assembly pictures:

100_2392

100_2393

100_2396

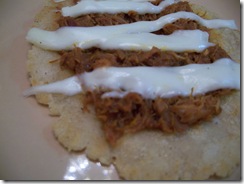
We had just a little leftover dough and decided to try to make tortillas for a little appetizer while we waited for the tamales to steam.  They actually turned out really good and crispy!  We just rolled the dough flat and sautéed them until golden in a little canola oil.

100_2401

What are your tricks to making recipes with a better nutritional profile?

« Newer Posts

Powered by WordPress